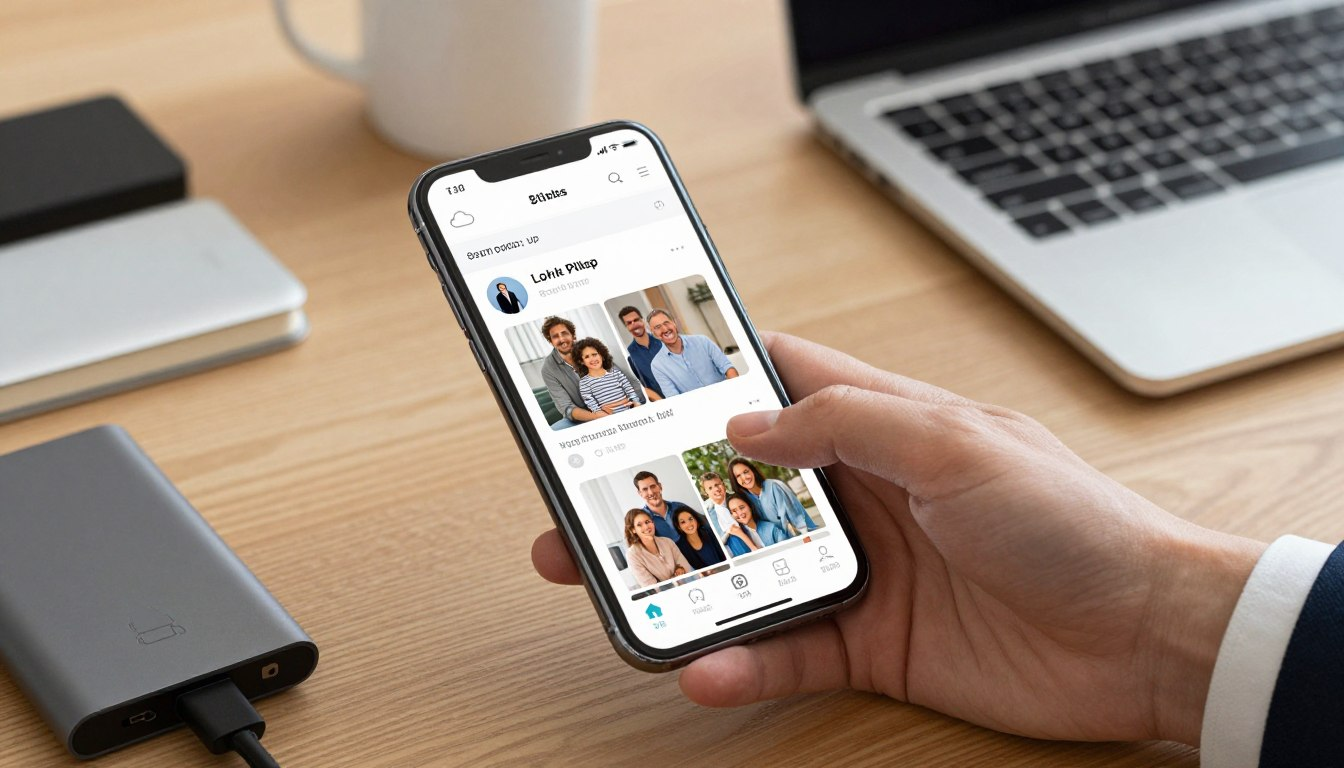
Every year, people take over 1.6 trillion digital photos. Yet, many memories are lost when devices fail. Your phone is like a digital safe for your most precious moments, like vacations and birthdays.
It’s the only way to keep these memories safe from being lost by accident.
Did you know one in ten people lose their data every month? This is why backing up your photos regularly is so important. This guide will show you how to keep your photos safe on both iPhone and Android.
We’ll teach you the best ways to back up photos from your phone. You’ll learn how to use cloud services and physical drives. Our goal is to help you create a backup system that works every time.
Protecting your legacy is easy with these steps. By following our advice, you can be sure your photos are safe. Let’s look at the key tools and settings you need for a solid backup plan.
Why Backing Up Photos Should Be Your Top Priority
Losing your phone photos can be really sad. Your phone holds many memories. Photos of family gatherings and big events are very special. What Happens When You Lose Your Phone Photos.
When you lose your phone photos, you lose a part of your life. It could be because of a stolen phone, a software glitch, or by accident. Losing photos of your child’s first steps or a special vacation is very sad.
It’s not just about the photos. It’s about the memories and feelings they hold.
The Cost of Not Having a Backup Plan
Not backing up your photos can lead to big losses. The cost is not just emotional. It can also cost money to get your photos back.
Without a backup, you’re at risk of losing everything. A bad update, a virus, or damage to your device can erase all your photos.
How Often You Should Back Up Your Photos
How often you back up your photos depends on how many you take and how important they are. Most people back up daily or weekly.
Use cloud services like iCloud for iPhone or Google Photos for Android. They offer automatic backup. Set them up when your device is charging and online to save battery and data.
How to Back Up Photos from Phone Using iCloud for iPhone

Backing up your iPhone photos to iCloud is easy. It keeps your memories safe. iCloud lets you store and access your photos on all Apple devices.
Step 1: Enable iCloud Photos on Your iPhone
To back up your photos, enable iCloud Photos on your iPhone. Go to Settings, tap on your name, then select iCloud. Scroll down and tap on Photos, then toggle on iCloud Photos. This syncs your photos with iCloud.
Step 2: Choose Between Optimize Storage and Download Originals
With iCloud Photos enabled, you have two choices. Optimize iPhone Storage stores full-resolution photos in iCloud. It keeps lower-resolution versions on your device to save space. Download and Keep Originals stores original photos on your iPhone. This is good if you have enough storage.
Step 3: Monitor Your iCloud Storage Capacity
Keep an eye on your iCloud storage. Go to Settings, tap on your name, then select iCloud. You can see how much space your photos use. You can also delete backups or data to free up space.
Step 4: Upgrade Your iCloud Storage Plan if Needed
If you’re out of iCloud storage, upgrade your plan. In the iCloud settings, tap on Manage Storage or Change Storage Plan. Pick a plan that fits your needs. Follow the prompts to upgrade. This gives you more space for backups and data.
| iCloud Storage Plan | Storage Capacity | Monthly Price |
|---|---|---|
| Free | 5GB | $0 |
| 50GB | 50GB | $0.99 |
| 200GB | 200GB | $2.99 |
| 1TB | 1TB | $9.99 |
| 2TB | 2TB | $19.99 |
By following these steps, your iPhone photos are safely backed up to iCloud. This gives you peace of mind and easy access to your memories on all devices.
How to Back Up iPhone Photos to Mac or Windows Computer

Backing up your iPhone photos to a Mac or Windows computer is key. It keeps your digital memories safe. By moving your photos to a computer, you protect them from loss due to accidents, damage, or software problems.
Transferring iPhone Photos to Mac Using Photos App
To back up your iPhone photos to a Mac with the Photos app, follow these steps:
- Connect your iPhone to your Mac using a USB cable.
- Open the Photos app on your Mac. It should automatically detect your iPhone.
- Click on your iPhone’s name in the Photos app sidebar.
- Select the photos you want to import. You can choose specific photos or import all new photos.
- Click “Import Selected” or “Import All New Photos.”
Tip: Make sure your Mac is running the latest version of macOS. This ensures the Photos app works well.
Transferring iPhone Photos to Mac Using Image Capture
Another way to move iPhone photos to a Mac is with Image Capture:
- Connect your iPhone to your Mac with a USB cable.
- Open Image Capture from the Applications folder or using Spotlight.
- Select your iPhone from the list of devices on the left.
- Choose the photos you want to import or select “Import All” to transfer all photos.
- Select a destination folder on your Mac for the imported photos.
Backing Up iPhone Photos to Windows Using File Explorer
Windows users can back up iPhone photos with File Explorer:
- Connect your iPhone to your Windows PC using a USB cable.
- Open File Explorer and locate your iPhone under “This PC.”
- Navigate to the “Internal Storage” or “DCIM” folder.
- Select the photos you want to copy and paste them into a folder on your computer.
Note: You may need to unlock your iPhone and trust the computer when prompted.
Using iTunes or Finder for Complete iPhone Backups
For a full backup that includes photos, use iTunes (on Windows or older macOS versions) or Finder (on macOS Catalina or later):
- Connect your iPhone to your computer.
- Open iTunes or Finder and select your iPhone.
- Choose “Back Up Now” to create a full backup of your iPhone, including photos.
Important: Regularly backing up your iPhone to your computer keeps your photos and data safe.
Best Photo Backup Apps for iPhone Beyond iCloud

iCloud is great for backing up your iPhone photos. But, there are other top photo backup apps too. They offer special features and benefits. You can pick the best one for you based on storage, ease of use, and extra features.
Google Photos: Free Storage with High Quality Option
Google Photos is a favorite for iPhone photo backup. It gives you a lot of free storage with its “High Quality” option. Your photos might be a bit smaller, but they’re very high quality. This is a great choice if you don’t mind a small quality drop.
Key Features:
- Free storage for high-quality photos
- Automatic backup and sync across devices
- Powerful search functionality using AI
Dropbox: Automatic Camera Upload Feature
Dropbox is a well-known cloud storage service. It has an automatic camera upload feature. This makes it easy to back up your iPhone photos. It doesn’t have as much free storage as Google Photos, but it’s great for sharing and working with others.
Key Features:
- Automatic camera upload for effortless backup
- File sharing and collaboration tools
- Cross-platform compatibility
Amazon Photos: Unlimited Storage for Prime Members
Amazon Photos gives Prime members unlimited photo storage. This is perfect for those who already have Prime. You can store as many photos as you want without worrying about running out of space.
Key Features:
- Unlimited storage for Prime members
- Integration with Amazon Drive for file storage
- Access to photos across various devices
Microsoft OneDrive: Integration with Office 365
Microsoft OneDrive is a cloud storage solution that works well with Office 365. It’s great for those who use Microsoft’s productivity suite. OneDrive has a strong photo backup feature and works well with other Microsoft services.
Key Features:
- Integration with Office 365 for seamless productivity
- Photo backup and storage
- Cross-platform access to files
Here’s a comparison to help you choose:
| Service | Free Storage | Key Features |
|---|---|---|
| Google Photos | 15 GB (High Quality) | Free storage, automatic backup, AI-powered search |
| Dropbox | 2 GB | Automatic camera upload, file sharing, collaboration |
| Amazon Photos | 5 GB (non-Prime), Unlimited (Prime) | Unlimited storage for Prime members, integration with Amazon Drive |
| Microsoft OneDrive | 5 GB | Integration with Office 365, photo backup, cross-platform access |
How to Back Up Android Photos Using Google Photos

Android users can use Google Photos for automatic photo backup. Google Photos is easy to use and helps you back up photos and videos.
Step 1: Install and Set Up Google Photos
To back up your Android photos, first install Google Photos from the Google Play Store. If you have a new Android, Google Photos might already be there. Open it, sign in with your Google account, and follow the setup steps.
Step 2: Enable Backup and Sync
After setting up Google Photos, turn on backup and sync. Tap your profile picture or initial at the top right, then go to “Photos settings” and select “Backup.” Turn on “Backup & Sync” to start backing up your photos and videos.
Step 3: Select Upload Size and Quality
Google Photos lets you choose between “Original” and “High quality” uploads. “Original” keeps your photos as they are, while “High quality” compresses them to save space. Pick what works best for you.
Step 4: Choose Folders to Back Up
To back up specific folders, go to “Backup” settings and choose “Folder backup.” This lets you add folders like screenshots or downloads to your backup.
Managing Your Google Account Storage
Google Photos uses your Google account storage. To check your storage, use the Google One app or website. Here, you can see how much storage you have and upgrade if needed. Keeping an eye on your storage ensures you have enough for all your photos and Google services.
By following these steps, you can back up your Android photos to the cloud with Google Photos. This gives you a reliable automatic photo backup solution.
How to Transfer Android Photos to Your Computer
Transferring your Android photos to your computer is key to backing up your precious memories. It frees up space on your device and keeps your memories safe. You can use different methods, based on your computer and what you like.
Using USB Cable to Transfer Android Photos to Windows
To move Android photos to a Windows computer, connect your device with a USB cable. Your computer should see your Android as a media device. Then, go to the “DCIM” or “Pictures” folder on your Android to find your photos.
To see your Android’s files on Windows, change the USB settings on your Android to “File Transfer” mode. This lets you move files between devices.
Using USB Cable to Transfer Android Photos to Mac
For Mac users, transferring photos needs a different step. You’ll need Android File Transfer, a free tool from Google. Connect your Android to your Mac with a USB cable, and Android File Transfer will open. It lets you move your photos.
Make sure your Android is unlocked and set to “File Transfer” mode for a good connection.
Using Samsung Smart Switch for Samsung Devices
If you have a Samsung device, Samsung Smart Switch can help. It’s a tool for moving data, like photos, between Samsung devices and computers.
Smart Switch works on both Windows and Mac computers. It’s a handy way for Samsung users to back up their photos.
Wireless Transfer Using Your Phone as a Drive
For a cable-free way, use apps that make your Android a drive on your computer. FTP (File Transfer Protocol) server apps are one option. They let you access your Android’s storage over Wi-Fi, so you can move photos without a USB cable.
Just install an FTP server app on your Android, start it, and then go to your computer’s FTP address to see your device’s files.
Alternative Cloud Photo Backup Solutions for Android

Android users have many cloud backup options. Each has its own features and benefits. While Google Photos is popular, looking at other cloud storage services can help you find what’s best for you.
Microsoft OneDrive for Android Photo Backup
Microsoft OneDrive is a solid cloud backup for Android users. It has an automatic camera upload feature. This means your photos are backed up right after you take them. It also works well with Office 365, which is great for those who use Microsoft’s productivity tools.
Key Features of OneDrive:
- Automatic camera upload
- Integration with Office 365
- Cross-platform compatibility
Dropbox Camera Upload for Android Devices
Dropbox is a well-known cloud storage service with a camera upload feature for Android. This feature backs up your photos and videos to your Dropbox account. This way, your memories are safe and easy to access on all your devices.
Dropbox Benefits:
- Seamless integration with Android devices
- Easy file sharing and collaboration
- Robust security features
Amazon Photos App for Android Users
Amazon Photos is a good choice for Android users, and even better for Amazon Prime members. It offers unlimited photo storage for Prime members. This is great for those who take lots of photos. The app also has automatic backup and photo organization features.
Amazon Photos Highlights:
| Feature | Description | Benefit |
|---|---|---|
| Unlimited Storage | Prime members get unlimited photo storage | Store as many photos as you want without worrying about space |
| Automatic Backup | Photos are backed up automatically | Ensure your photos are always safe |
| Photo Organization | Photos are organized by date and event | Easily find and relive your memories |
Sync.com for Privacy-Focused Photo Storage
Sync.com is for those who value privacy. It offers secure cloud storage with end-to-end encryption. This means only you can access your photos, adding extra security and peace of mind.
Exploring these cloud photo backup options can help Android users find the best service. They can choose based on security, storage, and how easy it is to use.
Setting Up Automatic Photo Backup on Your Smartphone
To keep your photos safe, setting up automatic backup on your phone is key. This feature saves your memories without you having to do anything. It’s great if you lose, damage, or steal your phone.
Configuring Auto-Backup Settings on iPhone
iPhone users can easily turn on automatic photo backup with iCloud Photos. Here’s how:
- Go to Settings on your iPhone.
- Tap on [Your Name] > iCloud > iCloud Photos.
- Toggle on iCloud Photos to enable it.
Then, pick between Optimize Storage and Download Originals based on what you need.
Configuring Auto-Backup Settings on Android
Android users can use Google Photos for automatic backup:
- Open the Google Photos app.
- Tap on the menu (usually three lines or dots) and select Settings.
- Choose Backup & sync and toggle it on.
Make sure to pick the right upload size and quality for your storage and photo needs.
Choosing Between WiFi-Only and Cellular Data Backup
When setting up automatic photo backup, you need to choose between WiFi-only or cellular data. WiFi-only saves your data but only works when you’re connected to WiFi. Cellular data backup works anywhere but uses your data plan.
| Backup Option | Advantages | Disadvantages |
|---|---|---|
| WiFi-Only | Conserves cellular data, generally faster | Limited to WiFi availability |
| Cellular Data | More flexible, works anywhere | Consumes mobile data, potentially slower |
Scheduling Automatic Backups for Optimal Performance
Most phones and backup apps automatically schedule backups. But, you can change this for better performance. For example, you might want backups to happen at night when your phone is charging.
- For iCloud on iPhone, the system automatically manages backup timing.
- For Google Photos on Android, backups happen as soon as new photos are found. But, you can help by keeping your device charged and connected to WiFi.
Secure Photo Backup Practices to Protect Your Memories
Keeping your photo backups safe is key to keeping your memories safe. As you take more photos, the chance of losing them grows. Strong security for your backups keeps your memories safe and easy to find.
Using Encryption for Your Photo Backups
Encryption makes your data unreadable to others. Choose a cloud service that offers end-to-end encryption. This way, only you and the person you share with can see your photos. Sync.com and pCloud are good choices for this.
To use encryption, check your backup service’s settings. You might need to set up a password or passphrase. Keep this password safe, or you could lose access to your photos.
Enabling Two-Factor Authentication on Cloud Services
Two-factor authentication (2FA) adds extra security. It asks for a second form of verification, like a code or scan. This makes it harder for others to get into your backups.
To turn on 2FA, go to your service’s security settings. Look for “Two-Factor Authentication” or “2-Step Verification.” Follow the steps to set it up, which might include scanning a QR code or entering a code.
Following the 3-2-1 Backup Rule for Photos
The 3-2-1 backup rule is a good way to keep your photos safe. It says to have:
- At least three copies of your photos.
- Store them on two different types of media.
- Keep one copy offsite.
For example, keep your photos on your phone, back them up on an external drive, and sync them with a cloud service. This way, even if one or two are lost, you’ll have another copy.
Protecting Your Backup Accounts with Strong Passwords
Strong, unique passwords are key to keeping your photos safe. Don’t use easy-to-guess info like your name or common words. Make your passwords complex with letters, numbers, and symbols.
Use a password manager to keep these passwords safe. This way, you can have strong passwords for all your accounts without having to remember them all.
By following these secure backup practices, you can greatly reduce the risk of losing your photos. Always check and update your backup plans to stay safe from new threats.
Complete Smartphone Photo Backup Checklist
To keep your smartphone photos safe, follow this checklist. A good backup routine is key. It protects your photos from loss or damage due to device failure, theft, or accidental deletion.
Daily Photo Backup Tasks
Here are daily tasks to keep your photos safe:
- Make sure your automatic backup is on.
- Ensure your internet connection is stable for backups.
- Check if your recent photos have been backed up.
Weekly Photo Backup Maintenance
Weekly, do these maintenance tasks:
- Check if you have enough space for backups.
- Review your backup settings to make sure they’re right.
- Manually back up any new photos or albums.
Monthly Photo Backup Verification
- Monthly, do these:
- Make sure your backups are complete and recent.
- Look for any backup errors or issues.
- Update your backup settings if needed.
Quarterly Storage and Security Review
- Every quarter, review your:
- Storage capacity and consider upgrading if needed.
- Security settings to keep backups safe with strong passwords and two-factor authentication.
- Backup strategy to see if it’s working for you.
Annual Backup Strategy Assessment
- Annually, assess your backup strategy:
- Check if your backup methods are working well.
- Look into new technologies or services for better backups.
- Plan for your long-term storage needs.
- By following this checklist, your smartphone photos will always be backed up. Regular maintenance and reviews keep you on track. This way, you’ll have peace of mind knowing your memories are safe.
Conclusion
Backing up your phone photos is very important. It keeps your special memories safe. You’ve learned how to do this, like using iCloud and Google Photos.
Having a photo backup plan means your memories are safe. Using services like Google Photos or iCloud gives you peace of mind.
To start backing up your photos, follow the steps in this article. Pick a method that works for you, like automatic backup or transferring to your computer.
By managing your photo backup, you won’t lose your favorite memories. Start backing up your photos today. This way, you’ll know your data is safe.
FAQ
Q: What is the most reliable way to back up photos from my phone?
A: The most reliable method is a multi-layered approach using cloud photo backup combined with a physical copy. For most users, enabling automatic photo backup via Google Photos or Apple iCloud is the first step, followed by a monthly transfer to an external hard drive to satisfy the 3-2-1 backup rule.
Q: Which is the best photo backup app for iPhone and Android users?
A: The best photo backup app depends on your needs. Google Photos is widely considered the best for its search capabilities, while Amazon Photos is unbeatable for Prime members due to its unlimited full-resolution storage. For those focused on privacy, Sync.com is a top tier photo storage option.
Q: How can I ensure a secure photo backup for my private images?
A: To maintain a secure photo backup, you must enable Two-Factor Authentication (2FA) on your Apple, Google, or Microsoft accounts. Also, consider using a service with end-to-end encryption or a local encrypted drive from brands like Samsung or Western Digital.
Q: Does backing up photos to the cloud reduce the quality of my images?
A: It depends on your settings. When backing up photos to Google Photos, choosing “Original Quality” preserves every pixel, while “Storage Saver” compresses them. iCloud and Amazon Photos (for Prime) typically store the original, full-resolution files by default.
Q: How do I handle smartphone photo backup if I run out of storage space?
A: When your photo storage options are full, you can either upgrade your plan (to iCloud+ or Google One) or transfer older photos to a computer or an external SSD. Deleting unnecessary screenshots and duplicate videos is also a great way to free up space for your photo backup.
Q: Is automatic photo backup better than manual backup?
A: Yes, automatic photo backup is superior because it removes human error. By setting your phone to back up whenever it is on Wi-Fi, you ensure that your latest memories are protected instantly without having to remember to do it manually.
Q: Can I back up photos from my phone directly to an external hard drive?
A: Yes. For iPhone and Android, you can connect a compatible external drive (like a SanDisk Extreme SSD) directly to the charging port and use the Files app (iOS) or a File Manager (Android) to move your photos without using a computer.
Leave a Reply